Home | Register | FAQ | Members List | Calendar | Today's Posts | Search |
Social Groups |
Registered
Members: 13,586 | Total Threads: 40,056 | Total Posts: 470,824 Currently Active Users: 1098 (19 members and 1079 guests) Welcome to our newest member, oatuzipaho |
|
|
Thread Tools | Display Modes |
15-06-20, 07:07 AM | #21 |
4 ring whore!
Join Date: Jan 2017
Posts: 3,124
|
Replacement is just about lining up the listing wires in the seat material with the listing wires in the foam and using the hog rings join them.
Some times you have to really push the rings into gap where the wires are, also check to make sure the wire has gone around the base wire, I missed several times. |
15-06-20, 07:13 AM | #22 |
4 ring whore!
Join Date: Jan 2017
Posts: 3,124
|
The seat back was much the same as the base, these are the head rest tubes that's slot in the frame, couldn't get the pigs out. I had a spare frame that I was able to see the fixings, I had to put a pair of pliers inside the seat base and squeeze the ends of the tubes together so the barb would slide up out of the seat.
Much the same for the tilt lever surround, it has a sort of barb that I had to try and press in so it came out of the frame without breaking it. And the back with the foam and cover removed, more or less the same as the base. |
15-06-20, 07:16 AM | #23 |
4 ring whore!
Join Date: Jan 2017
Posts: 3,124
|
|
15-06-20, 07:21 AM | #24 |
4 ring whore!
Join Date: Jan 2017
Posts: 3,124
|
I didn't try and recreate the groove the frame base bolster support fit in, I just left the it as a slot, worked fine, don't try and over think it.
Because I wanted to create a slot I masked up a bit of the foam with this template, this was the glue only got applied to the mating surfaces I wanted and created that slot for the seat back bolster support to locate in. A bit more of the old foam was breaking up, just cut it out and let a bit in, again less glue here I found worked better that a thick coating |
15-06-20, 07:26 AM | #25 |
4 ring whore!
Join Date: Jan 2017
Posts: 3,124
|
Trimmed with the carving knife and shaping with the cheese grater.
And the same here, reinforced with burlap. Tip, when gluing use a cardboard template so you only apply glue to one side of the burlap and foam, stick these first and then apply glue to the other sides, or you will be cussing as its almost impossible to get this to slide in with glue on all 4 sides. I also stuck the burlap around onto the side of the seat back foam to give added strength here as it is a very thin bit of foam Audi gave us. |
15-06-20, 07:39 AM | #26 |
4 ring whore!
Join Date: Jan 2017
Posts: 3,124
|
Padding out with some 1/4" foam
Don't try and stretch the foam too much, just make a pigs ear as shown And snip off tight to the existing Gently cheese grater shaping Also added a bit here over the back wire to stop them cutting into the foam back. Also on mine the foam was held to the frame first with hog rings as can be seen. |
15-06-20, 07:44 AM | #27 |
4 ring whore!
Join Date: Jan 2017
Posts: 3,124
|
Stretching the material back over and on to the stabby things. You have to work or walk the material down the foam, it wont just pull from the bottom.
If you find your material wont slide over the foam a little tip is to fit a bin liner over the seat foam, little bit of spray glue on the top to hold the bin liner in place, cut the bin liner where you don't want it and you will find the cover will slide over easy. Just leave the bin liner in place, providing you don't have any massive lumps you wont notice it. Hog rings holding the bolster material down |
15-06-20, 07:52 AM | #28 |
4 ring whore!
Join Date: Jan 2017
Posts: 3,124
|
And back together and cleaned.
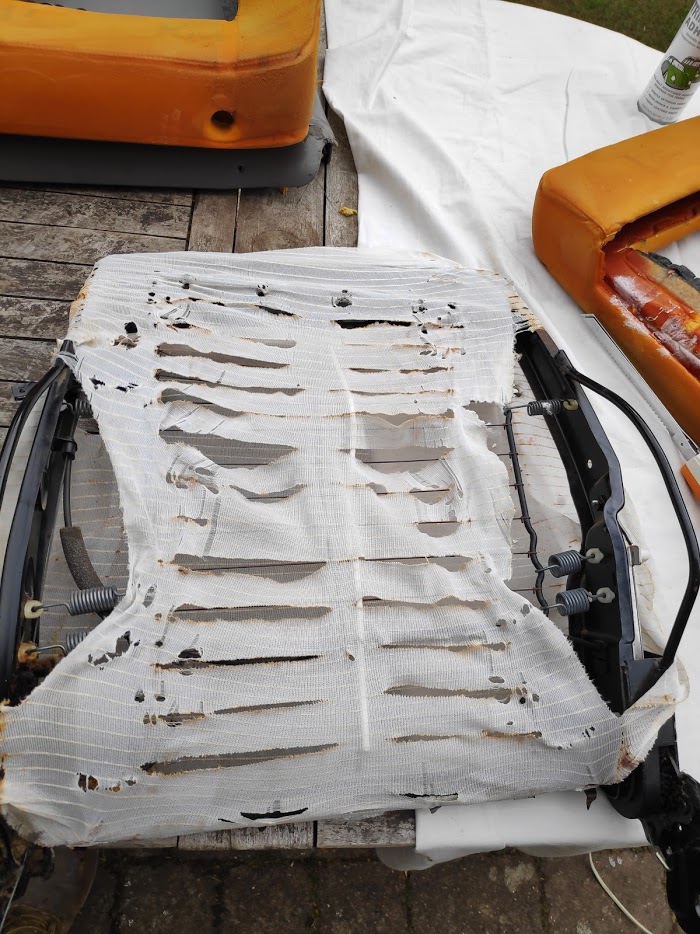
Little tip, don't wash and dry the material before you recover the seat, it will shrink a bit and stiffen up and it will be a pig to refit, leave it all baggy and soft until refitted and clean once fitted. This is still quite wet despite using a vax machine, hopefully the mark will come out, but they are 20 years old. There were a few areas I could have done with a bit more padding as I found some of the material had really stretched over the years, but they don't really notice and wasn't worth the effort to remove again. 
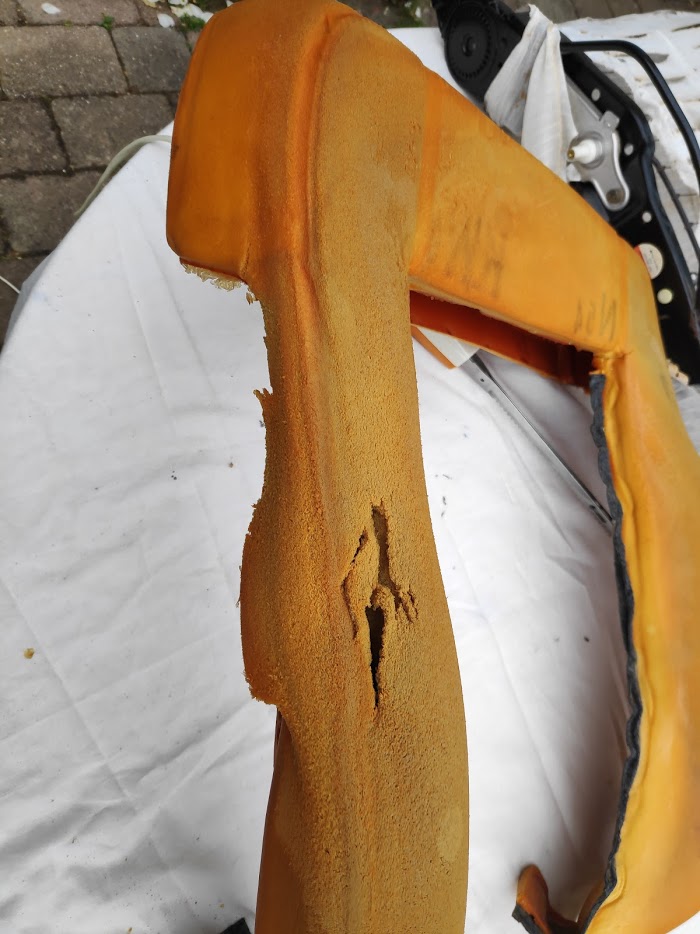
If you are doing vinyl or leather do it out in the sun, it will soften the covers and make it so much easier, but do be careful not to over stretch it also. I found when we use to recover and retirm the classics in the winter we would use a warm air blower for 5 min in front of the covers or slide the cover on the foam and put a hair drier so it could blow hot air up inside the seat foam cover cavity and soften the material that way. |
15-06-20, 08:43 AM | #29 |
Senior Member
Classic Audi Club Member
Join Date: Feb 2019
Location: Near an MB ur Quattro
Posts: 1,171
|
Excellent write up, and you've found all the secret clips/fixings!
One thing you could also consider, is swapping the base foam from passenger (mostly unused) to driver (heavily used) seat. The side bolster that gets damaged in each case is then put on the inside edge and doesn't get damaged any more, and the bits that were in the middle (untouched) are now on the outside. |
15-06-20, 08:44 AM | #30 |
4 ring whore!
Classic Audi Club Member
Join Date: Nov 2007
Location: Polmont
Posts: 2,617
|
An excellent write up.
__________________
1991 90 quattro 20v sport 1991 90 quattro |
Bookmarks |
|
|